
|
The Toyota Landcruiser Owners Club
Landcruiser Club - Dedicated to Toyota Landcruiser, Amazon, Colorado and Prado Owners
|
| View previous topic :: View next topic |
| Author |
Message |
sheepish
****
Joined: 28 Sep 2009
Posts: 294
Location: Bridgend, Wales
|
 Posted: Thu Jun 30, 2011 22:26 Post subject: Corrosion Posted: Thu Jun 30, 2011 22:26 Post subject: Corrosion |
 |
|
Thought I'd share this. Not as a "how to" a la Bob Murphy, because as you'll see my engineering skills are, well, lacking. But at least as a warning to where the rot is likely to set in so you can take some preventative action and learn from my mistake of not showing the underside of the car a pressure washer often enough.
Noticed the rear cross member was a bit flakey a few weeks ago when sorting towbar electrics. Didn't fancy welding so close to the fuel tank and in having a proper look underneath also noticed the next cross member back, the one that the panhard rod mounts to was looking holey, and that definitely needed the tank out to get to.
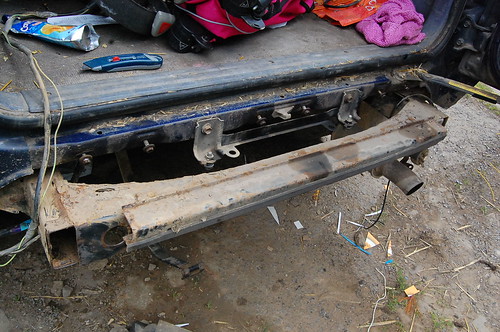
So this afternoon out came the tank. Nothing too fiddly here. I'd been soaking the hose clips accessible from a flap in the n/s rear wheelarch for a couple of days with WD40 and they just unwound. The three pipes that come from the top of the tank where a bit stickier but nothing much to worry about. Back bumper is very easy, although I'm not sure if those plastic clips ever really turn and come undone? I just prised them out. Ideally I'll find some new ones to replace them.
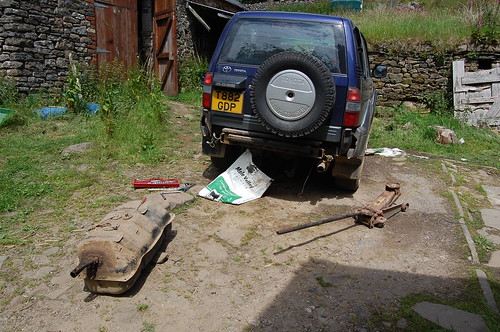
Fuel tank out by *Mrs C*, on Flickr
Now easy to see the rot.
Rearmost cross member.
Rear cross member by *Mrs C*, on Flickr
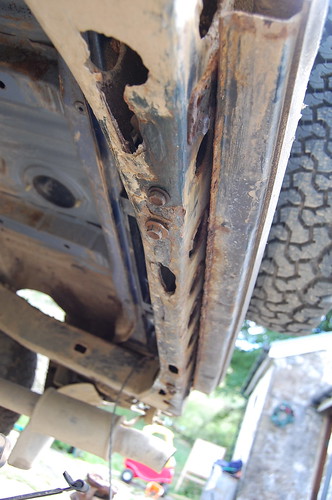
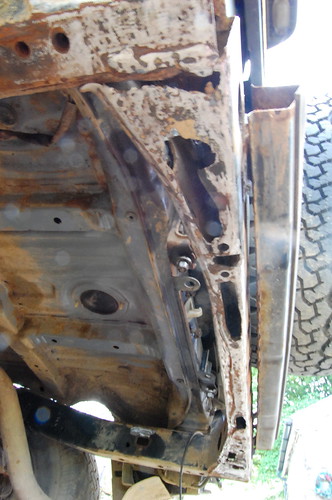
And next cross member back. The hole in this one was much bigger after I attacked it with a wire brush on the angle grinder.
Panhard Rod on a rusty cross member by *Mrs C*, on Flickr
The bracket bit the panhard rod bolts to has rotted on both sides. Otherside looks like I'm going to have to drop the axle and get the spring out to get to. Certainly seems to rot from the inside. I wonder how many power hoses get in there?
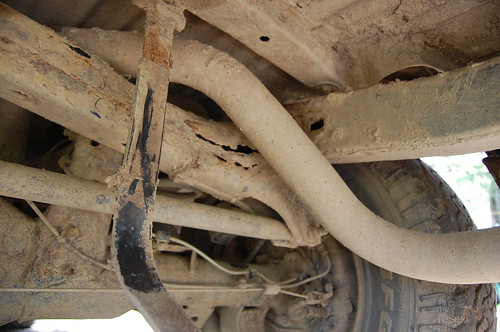
As you can see the exhaust is in the way. I removed one of the rubber mounts behind the axle which let me swing it about a bit, but it fouls on the prop so only moves so far. I probably would have been better off spending 3 minutes dropping the prop in hindsight and giving myself more room. Better still would be to remove the back section of pipe, but the bolts looked very bad on that. You can't really see it but there was also a hole rotted on the top of the member, although there is just enough room to get a grinder and mig torch in there.
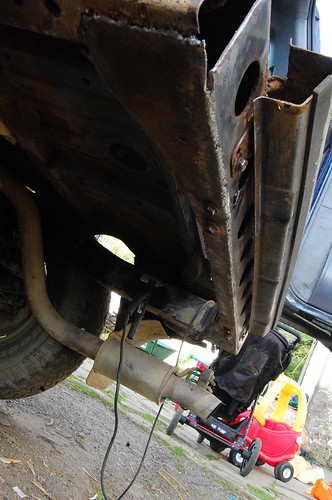
So cut a few patches from an old oil tank and splattered some weld on there. I could make excuses about gasless migs and old wire looking a bit rusty itself, but really I'm not very good at welding.
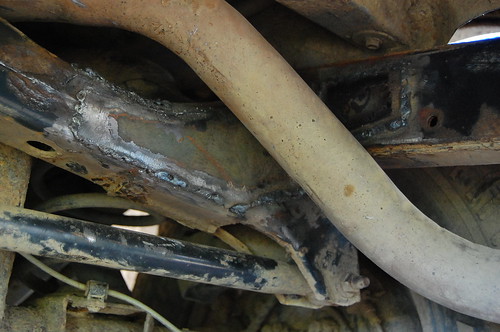
Patched Panhard Rod Crossmember by *Mrs C*, on Flickr
Looks better painted 
Tomorrow I'll do the back member and try and clean and paint all the stuff the tank obscures. And hopefully get the tank back on. This being our only car. The floor pan above the tank was almost corrosion (and mud) free. The chassis legs look good too, although now I've started getting holes I know others will be on the way, so thinking about some rust inhibitor for inside the chassis legs. Anyone got any recommendations? |
|
| Back to top |
|
 |
Google
Sponsor

|
| Posted: Thu Jun 30, 2011 22:26 Post subject: Google Ads keep this community free to join! |
|
|
|
|
| Back to top |
|
|
BobMurphy
Lifetime member


Joined: 01 Aug 2008
Posts: 1739
Location: Kirkliston, Scotland
|
| Posted: Fri Jul 01, 2011 1:10 Post subject: Re: Corrosion |
|
|
Wow ! Serious stuff.
You seem to be finding metal to weld to, which is a good sign (the hours I've spent stitching rust together on floorpans in the past  - on other people's cars of course). - on other people's cars of course).
I hope you get it finished while its dry.
More pics please  . .
Bob. |
|
| Back to top |
|
|
sheepish
****
Joined: 28 Sep 2009
Posts: 294
Location: Bridgend, Wales
|
| Posted: Fri Jul 01, 2011 23:07 Post subject: |
|
|
Day 2. Bit slow what with having to carry child 1 to school - oh yeah, no fuel tank. And home. And a 12 mile round trip on my bicycle when I realised I was out of Hamerite.
First up removed the top panel from the rear crossmember. Very easy. 6 bolts.
rear cross member with top panel removed by *Mrs C*, on Flickr
This revealed some rot in the top left hand corner of the rear cross member. Ideally I would have taken the next piece bolted on to the cross member off but the bolt heads for that had gone soft. Not sure there is ay way round this other than grinding off the heads and drilling the bolts out?
Cleaned up the underside with a grinding disk ready for welding. I knew this was a bit holey, but not this bad.
lots of holes in rear crossmember by *Mrs C*, on Flickr
I've never bothered patching anything this bad before but when a new cross member is £170 I'll cut some metal.
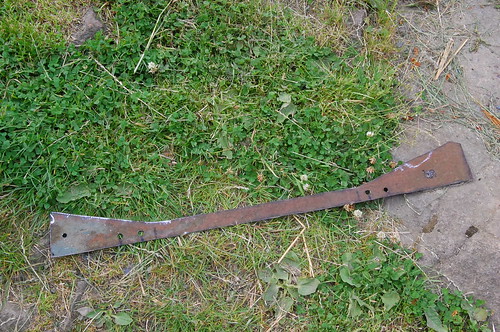
repair section for rear cross member by *Mrs C*, on Flickr
Much easier to weld than the cross member behind the axle.
welded up rear crossmember by *Mrs C*, on Flickr
And a little piece to patch the top.

top of rear crossmember by *Mrs C*, on Flickr
Cleaned up the other bits of chassis before I put the tank back tomorrow. There is a mud trap between the near side rear spring mount and the cross member infront of the rear axle. Try and get that clean once in a while. Feels very rough on mine. Also a small hole in the near side end of that cross member which is now patched. All painted with first coat of Hamerite, but a bit dark for any pics by the time I was done. Hopefully tank back tomorrow so I can pick up some visitors. 4x4 and plenty of ground clearance needed to get to our house. |
|
| Back to top |
|
|
munster
**

Joined: 09 Jan 2011
Posts: 114
Location: Cheshire uk
|
| Posted: Sat Jul 02, 2011 9:01 Post subject: |
|
|
Keep up the good work you will get there in the end good luck
_________________
LC 95 LWB 3.0TD, Cooper STT 265/75/16, Alien Snorkel, 40mm Ironman SL, 2000w inverter,Sterling Bat to Bat split charger system, Diff breathers,HID 8" Spots,bootstorage drawers.TTI 1100CB, Terrain RTT+ Awning, K4 winch mount, Goodwinch TDS Goldfish winch |
|
| Back to top |
|
|
|
|
|
You cannot post new topics in this forum
You cannot reply to topics in this forum
You cannot edit your posts in this forum
You cannot delete your posts in this forum
You cannot vote in polls in this forum
|
|

