| View previous topic :: View next topic |
| Author |
Message |
Nuclear Chicken
Lifetime member

Joined: 26 Feb 2009
Posts: 561
Location: Nordy Land
|
 Posted: Thu Mar 11, 2010 11:05 Post subject: Replacement antiroll bar bushes and drop links Posted: Thu Mar 11, 2010 11:05 Post subject: Replacement antiroll bar bushes and drop links |
 |
|
Simple idiots guide to replacing the front antiroll bar bushes and drop links on a 120. Apparently these wear out quite regularly. On a scale of 1 to 10 for complexity it scores about 2. Yes, it's that easy.
I had a bit of rattle at the front and eventually concluded it was the bushes or the links and so I decided to replace the lot. Thanks to Ian Rubie here for souring the Toyo bits.
First thing is to jack up the car and use axle stands to support it so that wheels are hanging free. Remove the two front wheels. Do one complete side at a time and this will give enough suport to the bar when working as it looks like a heavy brute if it decided to drop on your pinkys.
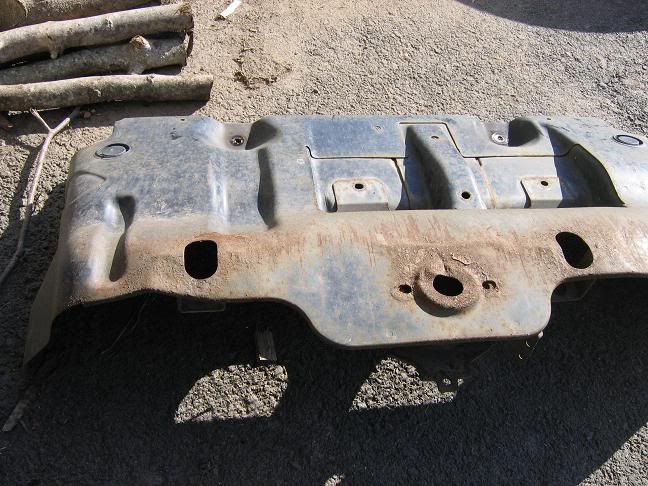
Remove the underbody front guard. Note mine is a bit bashed!. Will be getting a paint job another day. 4 x 12mm studs to be removed. On an older car these will be tight with rust. I had mine off before so they were simple enough to remove. I lightly grease the threads when replacing to keep them free for future use.
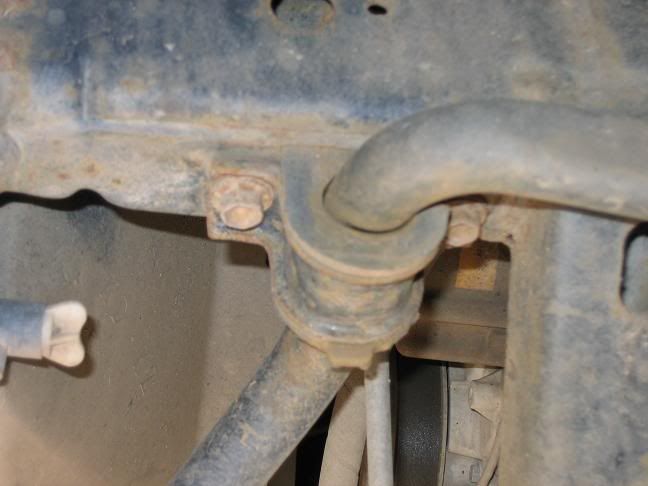
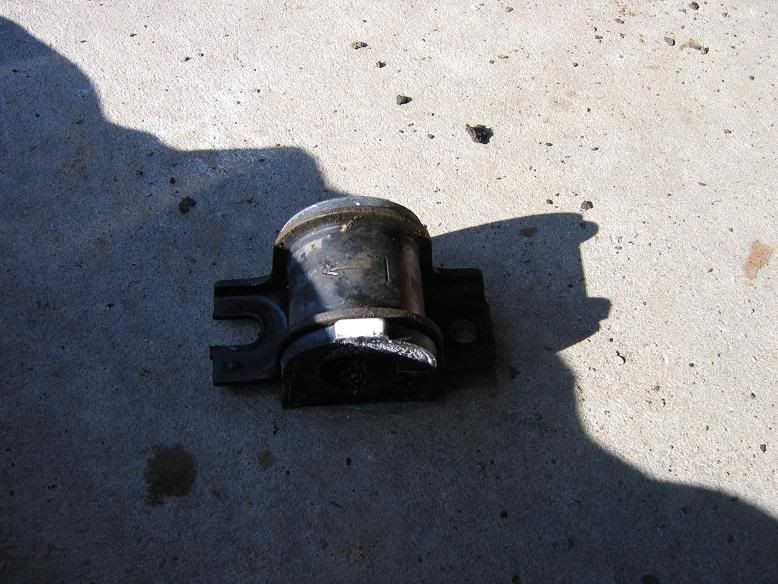
Old antiroll bar bush:
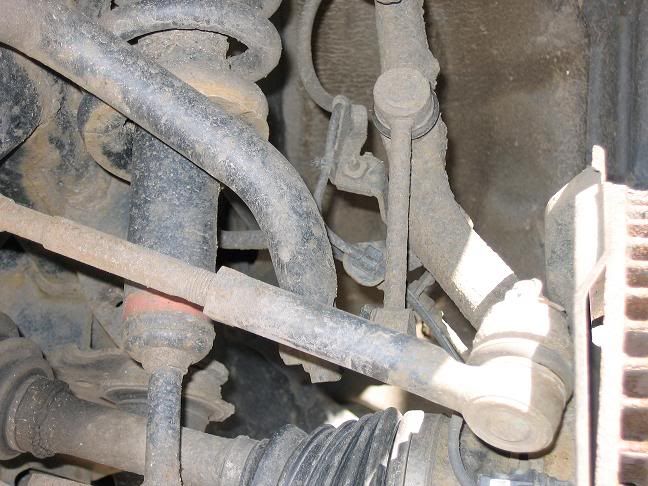
Old drop link:
Spray up the old bush bolts with WD40 or similar as they are likely to be tight. Just about visible here but fairly obvious. In fact, they were not nearly as tight as I expected.
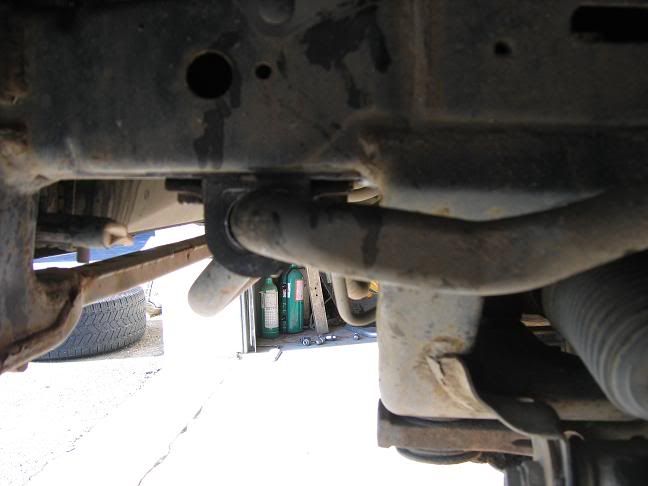
Remove the old bush from the saddle and replace with new. Note direction of the saddle and the orientation of the bush in the saddle. You can just see an arrow on the saddle body (and an 'L' in this case) that points to the front. The open slot goes to the front. Seen here upside down obviously. The bulkier bush collar goes to the inside, where the white dab of paint is. Leave the linl in place to do this and it will also support the ARB. If I recall, the studs are 14mm for the saddle and you will need a short extension to get proper leverage, especially at the O/S.
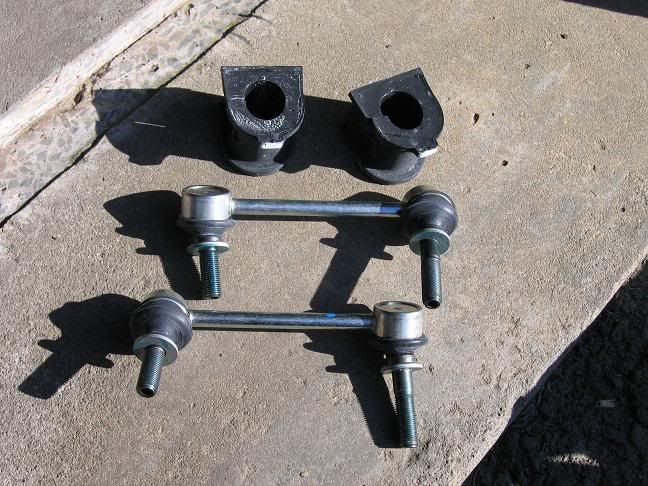
New bits waiting installation. The last time they will be this clean.
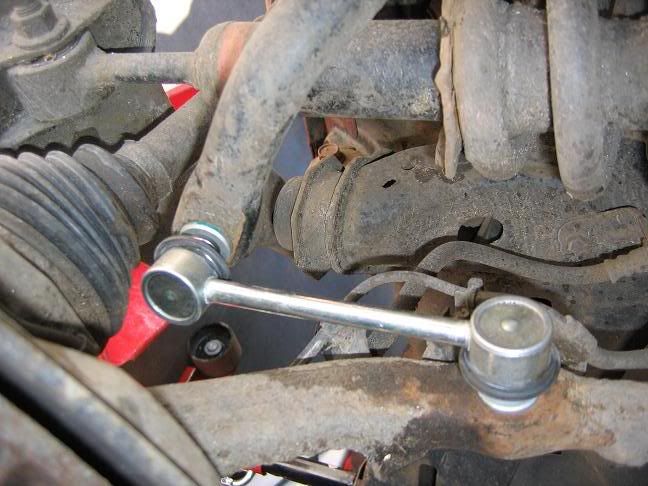
Links have 2 nuts of 17mm. There is a collar that is supposed to allow you to undo the nuts without the ball joints moving. Again with age, the nut did turn the collar but clamping with vice-grips as shown did the trick. Again, these nuts were not as tight as I expected and came off quite easily. I wire brushed them a bit first obviously and you can see they are quite crusty with muck. Mind the boot at the bottom if brushing so as not to tear it. Bottom nut is a bit trickier as the bulk of a rachet or t-bar will interfere with teh shock. My 17mm spanner is too short so I just perservered with the rachet and it worked fine.

Fit the new link. It will tighten up OK with out the grips as the collar will do it's job when nice and clean and new.
New bush installed, *beep* picture sorry!
Tighten up all your nuts and studs to the required torque (i.e. bloody tight) and that's one side done. 30mins tops.
Repeat on the other side. Refit the bash guard, refit the wheels and go drive.
In my case the bushes were worn but not through to the metal. No obviously play in the links either, although they were very free. But something that was rattling is now not rattling so good job well done. Hope this is of some help to someone.

_________________
'04 KDJ120R LC5. Died 17th Dec 2010. RIP. |
|
| Back to top |
|
 |
Google
Sponsor

|
| Posted: Thu Mar 11, 2010 11:05 Post subject: Google Ads keep this community free to join! |
|
|
|
|
| Back to top |
|
|
wooly0000
****
Joined: 01 Sep 2009
Posts: 490
Location: wigan
|
| Posted: Thu Mar 11, 2010 14:31 Post subject: |
|
|
Top job N/C thanks for the info, its great to see it with pics as it looks like a regular job for most of us, and i for one haven,t
done it on an LC before.  |
|
| Back to top |
|
|
marlot
*******
Joined: 27 Dec 2007
Posts: 1073
Location: worcester
|
| Posted: Fri Mar 12, 2010 7:24 Post subject: |
|
|
| Excellent. Thanks. |
|
| Back to top |
|
|
Nuclear Chicken
Lifetime member
Joined: 26 Feb 2009
Posts: 561
Location: Nordy Land
|
| Posted: Fri Mar 12, 2010 16:00 Post subject: |
|
|
Welcome. It made a very noticable difference to the car. The bushes I removed weren't worn through by any means but they were pretty close, particularly the O/S one. I guess it was a combination of a tiny bit of wear in the links and sloppiness in the bushes that allowed the bar to rattle about. And my motor has 77k miles with a rather dubious history.
_________________
'04 KDJ120R LC5. Died 17th Dec 2010. RIP. |
|
| Back to top |
|
|
Jon Sands
Newbie
Joined: 19 Oct 2015
Posts: 1
Location: West Cheshire
|
| Posted: Sat Jul 02, 2016 21:32 Post subject: Spot on Nuclear Chicken |
|
|
| Excellent advice and instructions I followed them today 😀 it took me much longer because of rusty bolts but no more knocking on tight corners. Thank you for the detailed pics 🤗 |
|
| Back to top |
|
|
HobbieJoe
Newbie
Joined: 08 Feb 2013
Posts: 7
Location: Spain
|
| Posted: Tue Sep 20, 2016 19:21 Post subject: Rattle Front Suspension |
|
|
| Great description thanks. Job completed in 1:30 hrs. No rattle from front suspension now. Drop links and bushes changed. |
|
| Back to top |
|
|
|


